Category: silver

19
Sep

OPEN D of E

Current Open Expedition Vacancies

If you have your own group of 4 or more participants we can organise a DofE Open Expedition at any time from March to October in a number of locations.

Open Expeditions what’s included

We will deal with all administration, book and pay for campsites, help with all planning and route cards.

We provide equipment

We will provide transport in the expedition area.

Open Silver practice/qualifying walking expedition in the Ashdown Forest 30th March-1st April 2015

Cost: £190 per person
Meet: at East Grinstead station
Start: 10am Monday 30th March
Finish: 4pm on the 1st April

£190 per person. We will meet at your home, school or other convenient place to all participants to help plan your expedition, ensure you have the kit you need and address any further training needs before your expedition. We then meet at East Grinstead station at 10am Monday 30th March to start your expedition and drop you back at East Grinstead at the end of the expedition at approximately 4pm on the 1st.
Contact Indie on 07818032443 or indie@indieoutdoors.co.uk

Open Silver practice/qualifying walking expedition in the Breacons 7th-10th April 2015

Cost: £220 per person
Meet: at Abergavenny station 7th April
Start: expedition starts on the 8th
Finish: 4pm on the 10th

£220 per person. We will meet at your home, school or other convenient place to all participants to help plan your expedition, ensure you have the kit you need and address any further training needs before your expedition. We then meet at Abergavenny station the afternoon before the expedition to check kit and talk about the expedition, you have the evening to relax:). You start the expedition the next morning finishing at about 4 pm on the 10th April, we then drop you back to Abergavenny station.
Contact Indie on 07818032443 or indie@indieoutdoors.co.uk

Open Gold practice/qualifying walking expedition in the Breacons 7th-11th April 2015

Cost: £270 per person
Meet: at Abergavenny station 7th April
Start: expedition starts on the 8th
Finish: 4pm on the 11th

£270 per person. We will meet at your home, school or other conventient place to all participants to help plan your expedition, ensure you have the kit you need and address any further training needs before your expedition. We then meet at Abergavenny station the afternoon before the expedition to check kit and talk about the expedition, you have the evening to relax:). You start the expedition the next morning finishing at about 4 pm on the 11th April, we then drop you back to Abegavenny station.
Contact Indie on 07818032443 or indie@indieoutdoors.co.uk

Open Gold practice/qualifying walking expedition on Dartmoor 20th-24th August 2015

Cost: £270 per person
Meet: at Totnes station 20th August
Start: expedition starts 21st
Finish: 4pm on the 24th

£270 per person. We will meet at your home, school or other convenient place to all participants to help plan your expedition, ensure you have the kit you need and address any further training needs before your expedition. We then meet at Totnes station the afternoon before the expedition to check kit and talk about the expedition, you have the evening to relax:). You start the expedition the next morning finishing at about 4 pm on the 24th, we then drop you back to Totnes station.
Contact Indie on 07818032443 or indie@indieoutdoors.co.uk

Comments from a Gold group after their Dartmoor expedition:)

“In April 2013 my group and I were anxious for our first out of school D of E experience, however it ended up to be our best D of E experience yet (despite the wet weather conditions!). Indie and Theo were amazing throughout the whole week, from the minute we stepped off the train, they were always there to help up along the way. Broadening our navigational ability, and learning techniques I had never even known existed, it was the most educational practice expedition of the three I have done.

But the education was not just limited to hiking and navigation, I learnt huge amounts about Dartmoor’s (where we were doing our expedition) geology and history, making it an even more rewarding experience.

I feel thoroughly prepared for my qualifying expedition, which I hope to do with Indie next summer. Thank you from all of us!” J. Ganis

19
Sep

SCHOOLS SAMPLE PROGRAMS

D of E Bronze Sample Programme

Here are some examples of DofE programmes we have run previously. We can tailor make a walking DofE expedition to anywhere in the UK or Europe. We do not run cycling or horse riding or canoeing expeditions allowing us to specialise in having excellent knowledge and experience of the hiking expeditions we do run.
Dartmoor National Park Expeditions

We have over 20 years experience (each, not combined!) of Dartmoor National Park. It offers an excellent variety of walks and terrain to suit Bronze, Silver and Gold Expeditions which can even be run simultaneously.
Our Dartmoor expeditions can be run from several accommodation centres depending on group sizes and the area we are using for the expedition. We can run training and qualifying expeditions in different areas of the Moors in order to satisfy DofE expedition conditions.
Sample Bronze Practice Weekend

Day 1
Meet at Dartmoor Expedition Centre deep in the South Moors (we meet you at the motorway junction and guide you so you don’t get lost!)
Introduce the course and the area.
Eat delicious home cooked food.
Fun night navigation exercise to get everyone in the spirit!

Day 2
Enjoy home cooked breakfast at Dartmoor Expedition Centre.
Each group sets off from the centre into the Moors with their instructor after group chat.
All groups meet at Hamel Down campsite where they pitch tents for the night.

Day 3
Enjoy (hopefully) breakfast rations at the campsite. Set off via different route as chosen by instructor back to the Expedition Centre.
Meet back at the Expedition Centre for debrief.
Get back on the coach and say good bye to the Centre and all the sheep.

DofE Silver Sample Programme

Here are some examples of DofE programmes we have run previously. We can tailor make a walking DofE expedition to anywhere in the UK or Europe. We do not run cycling or horse riding or canoeing expeditions allowing us to specialise in having excellent knowledge and experience of the hiking expeditions we do run.
Brecon Beacons

The Brecon Beacons are another excellent location being only 1hr from Bristol and featuring stunning landscape with plenty of history and local interest for aims and a variety of terrain lending itself to all levels from Bronze to Gold.
Our Brecons expeditions tend to be based in Crickhowell or Abergavenny on the eastern edge of the Brecon Beacons national park. There are numerous campsites within striking distance of these towns allowing multiple groups to leave in difference directions. Most routes will take groups either towards Llanthony Abbey and Offa’s Dyke or due north up Grwyney valley.
Sample Silver Practice Weekend

Day 1
Meet at The Old Pandy Inn bunkhouse.
Introduce the course and the area.
Enjoy a meal or BBQ at the Old Pandy Inn.

Day 2
Enjoy breakfast at the inn.
Each group sets off from the bunkhouse up Offa’s Dyke.
All groups meet at Llanthony Abbey campsite that evening.

Day 3
Set off from Llanthony Abbey via different routes to the Little Oasis campsite.
Each group receives further training from their instructor during the expedition.

Day 4
Walk from Little Oasis campsite to Crickhowell via Sugar Load mountain.
Debrief from instructor.
Return home via coach.

18
Sep
15
Sep

SCHOOLS SILVER

Your DofE Silver Award is quite a lot tougher than your Bronze for one good reason: on Bronze you were at home the morning of your first day (or in a cosy bunkhouse) and you will be back in your real bed on the evening of your second day. On Silver you have to deal with a whole day in the middle when you woke up in a tent, made your own breakfast, made your own lunch and dinner and then spent another night in a tent. If you forget anything or make any mistakes like getting really lost of really wet you will probably be miserable on at least one night. However it is for this same reason that this level is much more rewarding,

OVERVIEW

Your Silver DofE involves a 3 day practice and a 3 day qualifying expedition. Normally an Indie Outdoors programme also involves 1 day of pre-expedition training at your school where you learn various skills in and out of the classroom which build on what you learnt during Bronze.

Pre-Exped Training

Can be arranged for any day of the week and normally takes about 6hrs. Indie Outdoors instructors will arrive at your school and spend the day teaching more advanced techniques in the following areas:
Equipment – learn from your successes and mistakes in your Bronze and make your rucksack even lighter.
Campcraft – as you’ll be camping for two nights in a row this time you need to be quicker and better at all your campcraft skills.
Navigation – what you learned on Bronze was only the beginning I’m afraid! There is a lot more to learn about maps, navigation skills and compasses which will be introduced for the first time on Silver.
First aid – you will have forgetten everything about first aid by now so time to go have another go and learn some new things in the process.
Food and nutrition – you are going to have to carry everything you need for 2 breakfasts, 3 lunches and 2 dinners and loads of snacks, so choosing the right things with the right weights is essential.
Again each group will have some hands on navigation practice using the local area where the new skills introduced in the classroom will be put into practice.

Practice Expedition

The group meets at a suitable location chosen by the school and Indie Outdoors.
The groups are given a quick brief by their instructor about what these three days are going to be about.
Again the first day will be fairly intensive instruction in hands on navigation with your instructor watching and coaching you constantly which can be quite exhausting but by now you should start to feel proud of your ability to read your map and the landscape around you and figure out where you are.
One your second and third day your instructor may give you more room to navigate completely on your own to give a feel for finding your way through Silver level terrain without any help. It also gives you a chance to get thoroughly lost and then find yourselves again.

Qualifying Expedition

Your qualifying expedition will be pretty much just like your practice expedition. It can’t be on the same route as your practice and you will have to prepare new route cards (see route cards). You will also have a different instructor from your practice expedition.

12
Sep

D OF E FOOD

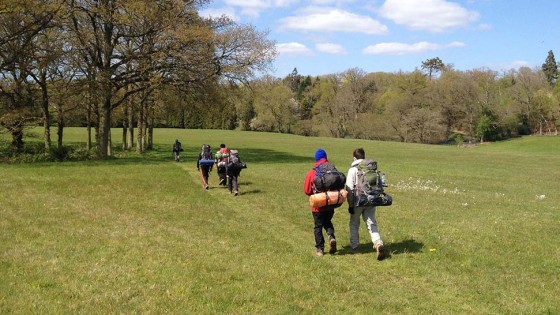
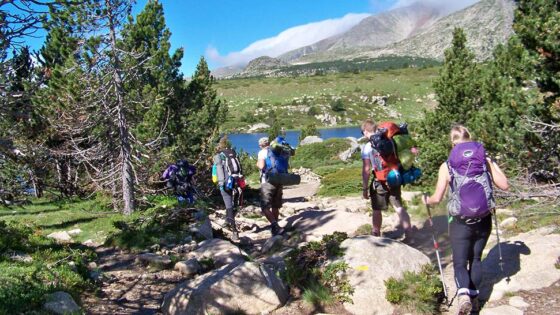
Choosing the right amount and right kind of food will make a huge difference to how successful and enjoyable your DofE expedition will be.

Personal preference

Choosing foods you like makes all the difference on your expedition because it will really improve your mood if you eat something you like and make you depressed and ready to give up if you are trying to eat something you hate. However many people, especially at bronze, choose things just because they like them without considering the things below and end up with something that’s really heavy, goes bad, doesn’t fill them up or that won’t cook properly.

Calories

You need to be aiming to eat at least 2,000 calories per day if not 3,000. This is a lot of food however and I haven’t seen many DofE participants eat 3,000 calories a day. On packaging calories are written as kcal / 100g which means how many thousands of calories there are per 100g. However in normal everyday life when we say 1 calorie we mean 1,000 calories or 1kcal.

Balance of food groups

The food groups are fat, protein, carbohydrate (including sugar) and (technically speaking) alcohol. Obviously we only need to bring the first three with us on our expedition.
Fat has the highest energy/calorie value per 100g of any food type but you can’t survive purely on fat and it doesn’t taste that great on its own (would you eat just butter?). Includes cheese, nuts and meat.
Proteins have a similar number of calories per 100g to carbohydrates but half as many as fat. Some people seem to need more protein than others: if an egg or piece of cheese fills you up more than a bowl of cereal then you are probably one of these people and should take more protein with you.
Carbohydrates are normally the main body of any meal. They give the fastest energy release. Includes rice, pasta, potatoes and bread.

Menu planning

Here are our suggestions for good things to include in your meals. Then I have included a list of things to avoid because they can cause specific problems when camping.


Breakfast
Porridge oats

Suggestion – Must be instant, not whole oats. Mix 50g oats, 50g powdered milk and 15g sugar in a small sandwich or freezer bag. Add 350ml water and cook whilst stirring until everything goes thick. You could also use an preprepard sachet of instant oats like Oat So Simple but these do not contain powdered milk.

Cereal

Suggestion – Choose the highest calorie per 100g cereal you can find (as long as you like it). Most cereals are around 340 – 380 calories per 100g but Crunchy Nut Cornflakes are over 400 and crunchy muesli type cereals (anything with ‘cluster’s in the name) are around 480 calories per 100g! Mix 50g cereal and 50g powdered milk in a sealable bag. To eat empty into a bowl and then pour cold water over and stir.

Beans

Suggestion – Not very high in calories and the tins weigh quite a bit but if a hot plate of beans makes you feel better in the morning then give it a go. You can get half size cans as well and ones with sausages in have a higher calorie content.

Cereal bars

Suggestion – Not very satisfying but some people like to get away early in the morning without doing any cooking or washing up so cereal bars might do at a pinch. Get the highest calores per 100g.

Soup

Suggestion – Instant soup sachets with pitta bread to dunk.

Hot chocolate

Suggestion – Not on its own but with some food as well hot chocolate can add some extra calories and warm you up nicely on a cold morning.

Frankfurters

Suggestion – Sausages which are smoked or cooked or dried already and which have not been taken out of their packets should be fine but if they are supposed to be kept in a fridge eat them the first day.

Hard boiled eggs

Suggestion – If you make yourself some hard boiled eggs before leaving home they should be ok for at least 24hrs but don’t keep them too hot for too long and try not to get them squashed…


Lunch

My personal approach to lunch is the deconstructed sandwhich idea: instead of making a sandwhich bring the ingredients you would like to have in a sandwhich with you separately so they don’t get squished and go soggy. Then eat them at the same time. You will also want to swap the bread for something that lasts longer (see bready things below). You could always bring some individual sachets of mayonnaise, ketchup etc to make things more interesting.

Carbohydrates
Bready things: pitta bread, oat cakes, naan bread, fajitas, wraps

Suggestion – Can be warmed up on top of a pan lid whilst you cook something else underneath and can’t get squashed as they already flat (actually oat cakes will get a bit squashed but thats ok)

Rice, pasta, mash, noodles

Suggestion – If you want a hot lunch treat read the dinner section below for suggestions


Proteins
Meat

Suggestion – Dried meats like pepperami, chorizo, beek jerky etc are all great sources of protein and fat. Anything out of the fridge section of the supermarket is a bad idea as it could go bad and give you food poisoning. The only exception might be frankfurters if you eat them soon on your expedition as they are salty and pasteurised to kill any bacteria. Once open they are not safe however so eat them all!

Fish

Suggestion – Tins of sardines, mackerel, tuna in sauce, oil or brine. Yummy and nutritious and can be eaten straight out of the tin saving on washing up.

Cheese

Suggestion – Most cheese will go sweaty and gross in your rucksack. Stick to things which are individually wrapped like babybel, dairy lea or cheese in a tube (are you sure you want to go there?). Presliced cheese is also great (Mexicana, Applewood smoked etc) but sooner or later the slices will stick to each other and become hard to separate so either separate them better in advance or enjoy them as they are all glued together.


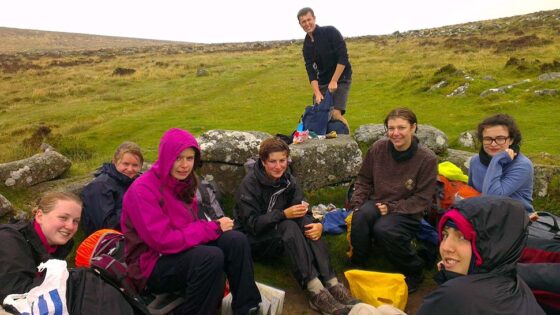
Dinner, supper, tea, whatever you want to call it…

Again choose a carbohydrate and a protein and go for the highest calories and the shortest cooking times.

Carbohydrates
Instant mash potato

Suggestion – One of my favourite camping foods. Incredibly easy to cook, hardly uses any water so takes seconds to boil enough and is warm and filling.

Rice

Suggestion – Never bring normal rice as everything takes twice as long to cook on a camping stove as on a stove at home and rice already takes 20mins so thats 40mins…. nightmare. 10min boil in the bag rice is OK but the best kind is the pre-cooked type in a sachet such as Tilda Steamed Rice or Uncle Ben’s Express. Also see instant risotto in the dinner section below.

Pasta and noodles

Suggestion – Just like rice never bring any kind of pasta which takes 10 or more minutes to cook normally. Only use quick cook types or instant meal types (like Pasta n’Sauce). Noodles tend to be faster than pasta and some pre-cooked types are virtually instant- you just stir them around in a little boiling water to heat them and eat.

Risotto

Suggestion – My other favourite carb along with instant mash. Get sachets of risotto which are already cooked with various flavours in like Uncle Ben’s Risotto. You can even boil the sachet in water without opening it then eat it out of the sachet when hot. Just pour two or three dessert spoons of boiling water into the sachet after opening and give it a stir. No washing up! Yeah!

Couscous

Easy peasy to make- get the precooked one, it should say something like: ‘leave for 3mins’ not: ‘leave for 10mins’. Measure how much couscous you are going to use (50g per person) and add the same volume of boiling water. About half a mug of each per person. Then just wait a few minutes.


Proteins
Tuna sachets

Suggestion – You can now get cooked tuna steaks in sauce or oil in a plastic sachet. You can heat them up by boiling the unopened sachet in water. 116 kcal/100g

Beanfeast

Suggestion – A vegetarian dried chili con carne like stuff which you add water to and heat up. 315 kcal/100g

Salami

Suggestion – Dried sausage like salami or chorizo can be sliced and thrown into past, risotto or eaten on its own. It has a very high protein and calorie content. 407 kcal/100g.

Smoked Sausage

Suggestion – Mattesons’ Smoked Pork Sausage is salty enough and has been smoked enough to preserve it and so as long as you don’t open the packet it will keep in your bag for the duration of your expedition. 310kcal/100g

Cheese

Suggestion – Some cheeses will go slimy in your bag, especially on a hot day. There are a few which will be fine- camembert, brie, babybel and feta. Camembert and brie will go very soft and runny but that’s how you’re supposed to eat them anyway… About 290-320 kcal/100g. Pre-sliced cheeses are great too but open the pack and separate the slices out otherwise they will stick together.

Sauces

Suggestion – You can either get a sauce which does not contain meat/protein such as tomato pasta sauce or a “complete sauce” such as Dolmio Express bolognaise or carbonara which contain beef mince or ham respectively and come in sachets. Buy sauces in sachets instead of glass jars and try to get ones in single serving sizes so you don’t have to reseal the packet. Most sauces are under 100 kcal/100g but satay sauce is nearly 200 kcal/100g because it contains peanuts and black bean sauce 136 kcal/100g.


Snacks

Snacks are very important if you want to increase your calorie count from around 1,500 to over 2,000. Snacks tend to have very high calories per 100g. Conversely this is why you should avoid snacks if you are on a diet! Remember you are not on a diet when on your DofE, even if you do want to lose weight, don’t try to do so on your expedition!

Nuts and trail mix

Suggestion – Nuts are very high in fat and therefore very high in calories. You can mix them with dried fruits to make ‘trail mix’. You can put whatever you want in your trail mix and put it in a resealable plastic bag. You can have it in your pocket ready for your hand to dip in whenever you feel a drop in energy.

Super Trail Mix

Suggestion – When people do a serious expedition to the South Pole or something they do not eat breakfast or lunch and instead just make a big bag or special trail mix which they keep eating all day. It contains broken up pieces of high calorie chocolate bars, flapjacks, chunks of cheese, salami and nuts. You could try making your own one or if the idea of eating salami and chocolate at the same time puts you off try making a savoury and sweet one separately.

Chocolate

Suggestion – Although on hot days chocolate might melt a little its got masses of calories in a small compact size, doesn’t go off and almost everyone likes it. The highest calorie bars are Kit Kat Chunky, Mars Bar, Snickers, Cadbury’s Dairy Milk. Basically anything ‘chunky’.

Sweets

Suggestion – Traditional hard boiled sweets are great as they contain plenty of calories and you can suck them as you walk. Starburst etc are also good ideas. Take ’em if you like ’em.

Peanuts

Suggestion – Either in your trail mix or on their own peanuts contain loads of calories and don’t go off. Check that no-one in your team has a peanut allergy though as its one of the worst allergies!

Pepperami

Suggestion – Yum yum. Don’t get anything sausage like which is supposed to be kept in the fridge though.


Drinks

Generally speaking you will run out of any drink you are carrying at the end of the first day and need to refill. As you can’t buy anything on your expedition its going to be water you’re drinking. If you do take any drinks for your first day don’t bring anything with caffeine in as it is a diuretic (makes you wee) and so you will become dehydrated.
The only other drink worth bringing is hot chocolate. It weighs hardly anything and gives you a sugar and calorie boost and makes you feel better either in the evening before bed or in the morning to wake you up. Get the single serving hot chocolate sachets. Make sure its not Cadbury’s Options or Highlights as these are low-fat and low calorie versions. Yuck.


The Bad List

A list of foods which are not very suitable to take on a DofE Exped.

Bacon

Personally I don’t recommend bacon as it causes a mess of your cooking pan, you won’t have oil to fry it in so it will stick and you have to use it all in one go or it will go rancid. Some people just ignore all my advice though..

Sausages

Fresh ones are a no-no as they will go off and you could get nasty food poisoning.

Eggs

You could take raw eggs in a tupperware dish and then try to fry them but where would you get the oil from?

Mushrooms, tomatoes etc

Fresh stuff will not last, could get squashed and contains no where near enough calories to get you going. Tinned things weigh too much and don’t contain enough calories to make up for this.

Fresh fruit

Fine for your first day but don’t bring more than you need for day one or it will get bruised and go nasty in your rucksack.

Crisps

Although they are high in calories they are bulky due to needing to have air added to the package to stop them getting crushed so they take up way too much room in your rucksack. A bag of Walker’s crisps has the same calories per 100g as a chocolate bar but takes up twice as much room at least and contains fewer grams.

Pot noodle

Very bulky as the packaging contains lots of space inside for the water. Not very high in calories or indeed much of anything else either…

11
Sep

D of E KIT LIST

Here is the kit list Indie Outdoors recommends each individual carries plus group equipment. We have made a few notes about certain items of equipment and stated where they should be carried ideally.

Individual Equipment:
Item Location Notes
Map in hand all the time!
Compass attached to rucksack/coat in easy reach
Watch er… on your wrist ‘innit
Torch bottom of rucksack headtorch if you have one- definately a headtorch for gold
First aid kit side pocket of rucksack
Whistle attached to rucksack some rucksacks have a whistle as part of the shoulder strap
Emergency kit top of rucksack a small bag or pencil case containing the things noted below as belonging in your emergency kit
Coins/card for telephone in emergency kit
Notebook and pen/pencil in emergency kit
Waterproof jacket middle – top of rucksack ready for when it rains this is esential even if weather forecast says no rain
Water bottle in side pocket of rucksack sturdy one as disposable ones may break after repeated use
Expedition safety card in emergency kit optional in bronze and silver, found in Entrance Pack
Extra warm clothing bottom of rucksack
Bivvy bag/large poly bag in or near emergency kit an emergency sleeping bag made of orange plastic or aluminium
Waterproof trousers in middle of rucksack remember: this is England. It will rain.
Emergency food rations bottom of rucksack but separate from normal food rations
Matches in camping kit
Large rucksack 55-65 litr capacity. Should always have both shoulder and waist straps.
Strong plastic bags lining rucksack and wrapped round anything you don’t want to get wet- especially matches and sleeping clothes Rubble sacks are the best as they are very strong. Otherwise a gardening or household waste bag
Sleeping bag wrapped in plastic at bottom of rucksack- not tied to outside of rucksack where it will get wet!
Sleeping bag liner camping kit optional
Sleeping mat wrapped in plastic very firmly and tied to outside of rucksack or placed inside if room
Small sum of money in emergency kit remember you must not buy anything unless its an emergency even on practice
Plate/bowl camping kit no need for both
Mug camping kit plastic, metal or thermos style
Soap and towel (small) camping kit if you are really keen on keeping weight down cut a bar of soap in half or only have one bar per group
Tooth brush and toothpaste camping kit no need for more than one tube of toothpaste per group
Toilet paper camping kit couple of rolls per group
Camera optional
Boots Waterproof. If new- make sure you wear them out for a few walks or even just round the house otherwise brand new boots will give you blisters.
Socks one per day plus one spare is a good rule
T -shirts made of wicking or quick dry material ideally but these can be expensive
Sleeping clothes camping kit (tightly wrapped as this is the most important thing that must not get wet!) simple, light cotton night clothes
Sweater/fleece middle of rucksack ideally not cotton or wool as these materials do not dry once wet. A polyester fleece is ideal. No hoodies as if the hood gets wet it soaks through to the rest of your clothes.
Trousers worn one pair should be enough. Two on gold perhaps. LIghtweight quick dry walking trousers are ideal.
Underwear camping kit couple of pairs
Flip flops flip flops let you walk about the campsite without either getting grass and dew on your feet in the morning or having to put your walking boots on
Sun hat, sun cream, sunglasses side pockets if sunny, middle of rucksack if not if the weather forecaste is very definately saying no chance of sun then don’t bother but normally you should always have sun protection with you
Gaiters optional- help keep your boots and trousers dry


Group Equipment:
Item Location Notes
Tent(s) one person carry the poles and one person carry the material Provided by Indie Outdoors
Stove camping equipment wrap in a plastic bag to prevent leakage of remains of fuel. Provided by Indie Outdoors
Fuel hang from outside of rucksack must be DofE approved fuel bottle. Only gold groups are expected to carry their own fuel bottles. Provided by Indie Outdoors
Matches camping equipment inside resealable plastic bag
Cooking pots camping equipment provided by Indie Outdoors
Soap pads or sponge with abrasive pad camping equipment- inside resealable plastic bag a brillo pad is a good trick as it removes stubborn stains on aluminium pans and does not need soap as its already impregnated with it
Washing up liquid camping equipment- inside resealable plastic bag as may leak no need if you use brillo pads!
Tea towel camping equipment
Water container side pocket of rucksack 1ltr capacity recommended. Sturdy one will last longer than a disposable plastic one which is only suitable for bronze
Food for main meals camping equipment see notes on food on Food page
Trowel middle of rucksack, top or side pocket gold only. For doing a poo in the wild
Route card(s) side or top pocket of rucksack or inside coat see the Route cards page for help on filling them in
Map cases waterproof maps are a much better investment than a map case and much easier to use
Pack of cards/game forget bringing anything electronic- its batteries will die!
Plastic bags (for rubbish) you must take away and bin all your own rubbish. Don’t expect to find a bin anywhere near where you eat your lunch or dinner
Accessibility

There are three levels of accessibility you need to think about when packing your rucksack. They are : things you need very often or need to be able to access in an emergency, things you might need or need occassionally during the day and things you won’t need until the evening.

The first category must be packed in the top or side pockets of your rucksack, placed in pockets of your coat or held in hand, and includes things like water, maps, compass and first aid kit.

The second category needs to be in the top or middle of the main body of your rucksack and includes things like your waterproofs and your layers of clothing. Think of things you might need if the weather changes for example.

The third category is things you couldn’t possibly need until you camp and therefore have time to unpack your rucksack completely in order to get at. These things can go at the bottom of your rucksack and include your tent, sleeping bag, cooking equipment and night clothes.

How to poo in the woods

This is an important consideration for gold expeditions. You are supposed to be wild camping and therefore there should not be a toilet anywhere in sight as you camp.

In order not to spoil the beautiful countryside through which you are travelling it is important to know how to poo properly. Here’s how.

You will need: a trowel, matches and toilet paper.

First: dig a hole in the ground
Second: poo in the hole
Third: cover up the poo with plenty of dirt, soil and leaves. The better covered the less likely it is that an animal will dig it up. Ideally place sticks or stones on top as well.
Fourth: carefully(!) set fire to the toilet paper and burn it completely. This might seem odd but toilet paper does not degrade very quickly and looks terrible if left lying around as it is bright white or pink and so shows up against the natural browns and greens of the countryside. Careful though I have know a DofE group set fire to the dry underbrush when they tried to do this. Make sure there is nothing flammable next to your toilet paper that might catch fire and make sure the paper goes out completely before leaving it.

10
Sep

D of E ROUTE CARDS

Filling in route cards can be time consuming until you have had some practice but if you can get into the habit of referring to them at each stage of your journey they can help make sure you do not get lost and speed up your navigation.

Please click here to download a route card

All the information at the top of the card is pretty straightforward. The bit we are going to concentrate on is the section where you fill in the legs of your journey.

Legs
First you need to decide how long a leg should be and how many legs your journey should be broken into. Generally you don’t want to break your day into more legs than there are on one sheet when planning a bronze expedition. On Silver or Gold you might need to use more than one sheet per day. You can download a simplified continuation sheet for these extra legs by clicking on the links on the left.
Generally speaking a leg is a section of a journey which follows a certain path or feature or travels between two obvious landmarks or it could be a section of journey which essentially travels in one direction. So if you follow a stream, path or road then make this part just one leg. If you come to a junction and continue on the same path in the same direction do not make a new leg but if you turn off your path and follow a different path, road or stream for example then you need to start a new leg. If you are striking off across open ground and need to make a major directional change at some point then you should start a new leg when you change direction. Don’t make legs too long (no more than 2-3 kilometres)

The idea is: one person is navigating with the map and one holds the route card. When you arrive at the end of a leg, the one holding the route card should be able to glance at it and then at the landscape and say: ‘Yeah I’m pretty sure this is it, we should now go into the woods and follow the path.’ The one with the map can then confirm this. This might seem complicated but is actually quicker and more accurate than just using the map. A good navigator, using the map and the route card together will be less likely to get lost.

Direction
You should not need to use a compass when working out your general direction. Just use your judgement and write N, NE, E, SE, S, SW, W or NW. If you really want to make an accurate bearing place the edge of your compass along the path you are going to take with the arrow pointing in the direction you are walking then turn the bevel around so that the lines underneath the compass needle are lined up with the N-S lines on your map. Then read off your bearing. This is called map to land orientation and means you are now holding your map the right way around.

Distance
Use a piece of string or shoelace and measure it using the edge of your compass which corresponds to the size of map you are using. For example if using a 1:25,000 map (quite likely) measure out 1000m and mark your string with a pen. Then you can measure your leg using the string which will bend easily along the twists and turns of your route. Don’t be too accurate or you will be there forever.

Height climbed
The contour lines on your map are at 10m intervals so just count them up. If you go up and down then up again you need to add all the up together because you need to know how much height you have walked up as this will affect your walking speed.

Time allowed for journeying
Estimate the normal walking speed of your group. A fit person on flattish ground carrying only a small rucksack can walk at 5kmph. Taking into account the size of your rucksack and your fitness you will be travelling at around 2-4kmph. Use this formula to calculate your time for journeying then add 1 minute for every contour line you walk up. It is impossible to work out what your real walking speed will be until you have had a go at it. This is what only your practice expedition can teach you.

Time allowed for exploring, rests, meals etc
Exploring means doing the things you need to do to complete your aim. You should give yourself about three rest periods on top of this- probably two of 20mins and one of 30-40mins. If you are unsure give yourself more rest than you think you need then you might surprise yourself and get in early. Remember unless you have special dispensation you should be travelling for at least 50% of the day (3hrs for bronze, 3.5hrs for silver and 4hrs for gold).

Estimated time of arrival
Don’t fill in this column until you have finished working out all your legs and how long you think they will take. If you change your mind about something you will have to change everything in this column so leave it ’til last.

30
Jun

Putting up a Tent

A walkthrough on how to put up a tent

First pick your spot. There’s no science to this just pick the flattest, driest bit.
Know where your stuff is. The group members who are carrying the tents should also be in charge of putting up the tents and they should know exactly whose bag all the tent bits are in and where in each bag they are. It’s simplest for one person to carry a whole tent and then take some weight off them rather than splitting tents but some groups like to split the weight of the tent between two people. Remove the material, pegs and poles from the tent bag. Place the tent bag inside a pocket or a rucksack immediately or it might blow away or get lost.

Spread the tent material out. Remove the poles from their bag and place the pole bag in the tent bag immediately or you will lose it! Assemble all the poles. Most tents have two long poles the same length and one shorter one. Sometimes the tent will have some colour coding to help you figure out which pole goes where. Pick a pole and insert it all the way. Remember to only ever push poles. Never pull on poles as they will come apart. Do not plug the ends of the pole in yet. Push all the remaining poles through. Once all the poles have been inserted start plugging the ends in and the tent will start to take shape.

Start pegging. With a hoop tent like this peg one end in and then the other pulling the whole tent taught and making sure it is straight at the same time. With a dome tent it is not so critical which pegs go in first so start with the four corners where the poles plug in then peg out the porch pulling it tight and making sure it’s straight.
Push pegs in at a 45° angle with the tip facing in towards the centre of the tent. The opening in the head of the peg should face away from the centre of the tent or the material can slip off the end of the peg.


Next either hang your inner if the poles are inserted through the waterproof outer of your tent or drape and secure your outer if your poles are inserted into the inner. In our video the tent has an inner which is hung from the inside of the outer but we have cleverly not removed the inner last time we took it down. With some tents like this one you can save yourself time by leaving the inner and outer attached to each other at all times. With other tents however this is not possible.

Guy ropes are only necessary in the following situations: your tent requires them to stand up properly, you are expecting rain and wind or you find a baggy bit of your tent which requires pulling out. Otherwise they are just a good way of tripping over in the middle of the night. Finally make sure you place the peg and pole bags in the tent bag if you haven’t already and place that inside the porch of your tent so they don’t blow away.

Extra Hints & Tips

To remove stubborn pegs stuck in the ground either insert another peg through the head of the peg in the ground and pull out or pull on the material which the peg is inserted through and pull on that. Make sure in both cases you are pulling the peg out at the same angle you pushed it in: hopefully 45° away from the tent.
If you see slack areas of your tent re-peg out your tent to make it more taught or use your guy ropes to increase the tension.